Suitable for laptop/desktop/computer on Mac or Windows system
Audio Settings
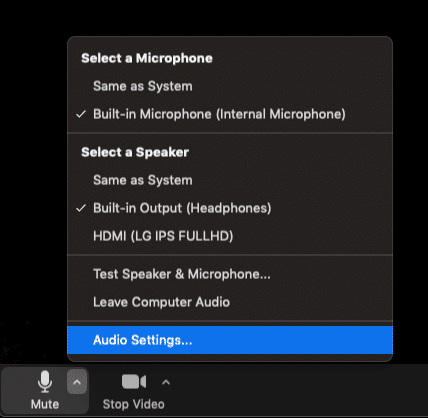
Locate the Audio Settings menu by clicking the small arrow next to the ‘Mute’ button during a video meeting. Alternatively you can find this option in your top-bar menu File/Zoom>Preferences>Audio
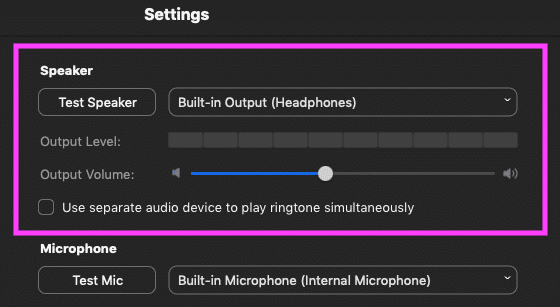
Speaker (Output)
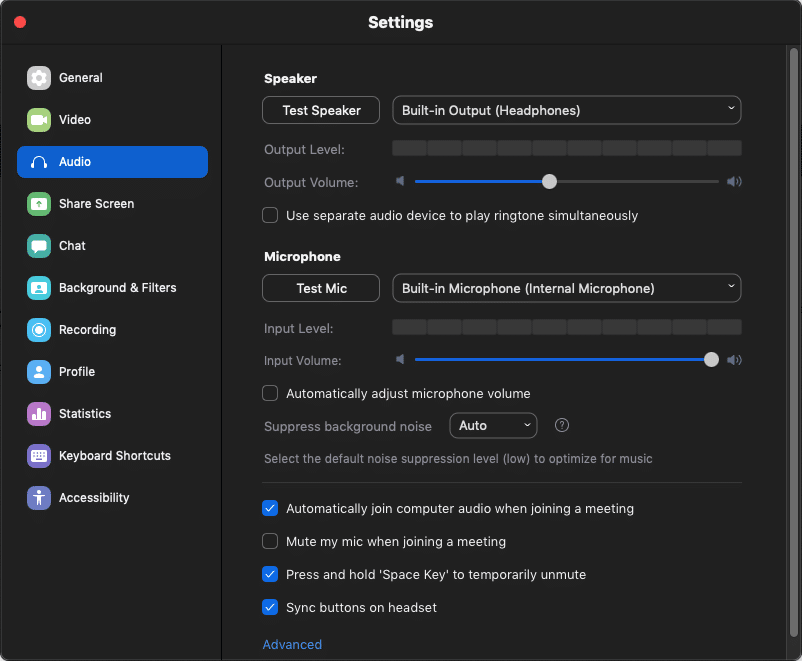
The speaker is your output, ie. the sound you are receiving from the other person. When they speak or make sound it should light up the bar where it says ‘Output Level’. This will most likely come out of your laptop speakers by default. If you plug in headphones it should automatically change your output to that. If you have a bluetooth speaker it should be detected automatically when you turn it on (if previously connected and setup with device) but you can select it from the dropdown menu next to ‘Test Speaker’ if need be. The ‘Output Volume’ is just the volume you’ve set on your laptop/computer (shouldn’t be lower than 50%).
Microphone (Input)
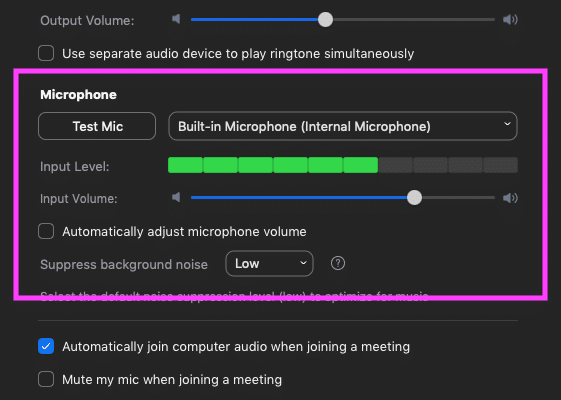
Unless you have attached an external microphone this should be set as the default built-in/system microphone and won’t need changing. If you do have an external microphone (such as the popular Blue Yeti) you can plug it in and select it from the dropdown menu next to ‘Test Mic’. When you speak, the bar next to where it says ‘Input Level’ should light up depending on how loud you speak.
Here are some settings to change:
UNTICK ‘Automatically adjust microphone level’ so it doesn’t pull the volume down every time it hears a loud noise (ie. your sax!).
SET ‘Input Volume’ to about 70%. You don’t want it too loud that the sound distorts!
SET ‘Suppress Background Noise’ to ‘Low’ from the dropdown menu.
UNTICK ‘Mute my mic when joining a meeting’ so that you don’t have to unmute yourself every time you enter the meeting.
Advanced Settings
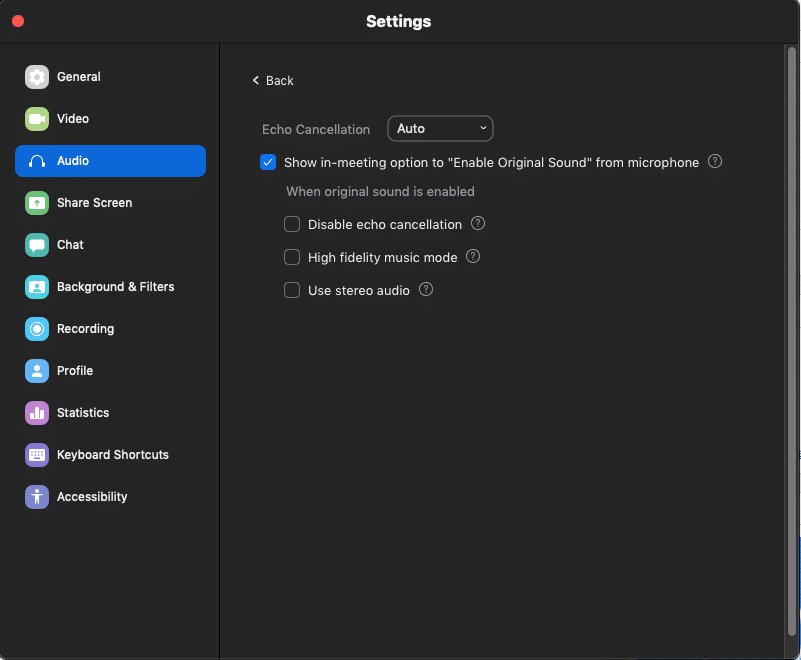
Click ‘Advanced’ at the bottom of the Audio settings menu for further options.
TICK ‘Show in-meeting option to “Enable Original Sound” from microphone’.
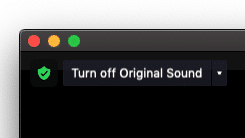
When you are next in a video meeting you should see a new button in the top-left corner of your video. You want to click this so that it says ‘Turn off Original Sound’ when you are reading it. This means that the Original Sound setting is active and all sound is being sent, nothing is being suppressed by Zoom.
That’s it! This should give you the optimum Zoom settings for music-making online! Ensure your wifi signal is strong and that you are close to your router for best results. Good luck and see you in the virtual world!



How we can make the audio more clear? audio visual services
The tips above should give you the best audio experience from the software side. Otherwise, you could upgrade your hardware, such as microphone, webcam, lighting, speakers. Upgrading your microphone can vastly improve your audio quality and your teacher will most likely already be using a professional microphone. Take a look at our recommended microphones here: saxbandits.co.uk/best-microphones-for-online-music-lessons/